A snoot is a tube in front of your flash, which keeps its beam of light tight and concentrated, while a grid has lots of smaller, parallel tubes that do essentially the same thing.
Snoots and grids have a lot in common and the line between them is thin, but I usually refer to snoots as longer tubes, often made of a softer material like foam or fabric, while grids are usually shorter and place a tubular grid or honeycomb in front of the light.
You can use snoots and grids in two ways: to make concentrated spots of light and to keep light from falling where you don't want it... by keeping it as a concentrated spot.
Snoots: perfect for DIY
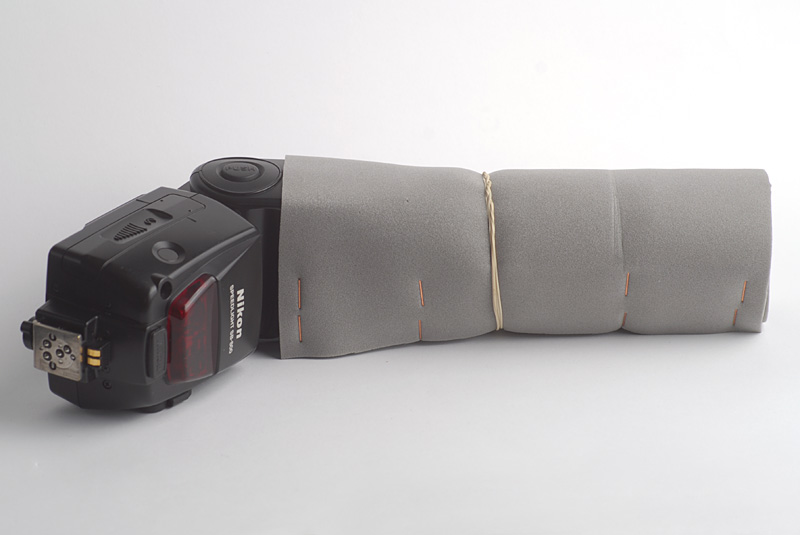
Snoots come in a wealth of different shapes and sizes. They are really easy to make yourself, but can also be bought ready made. My favorite DIY-snoot is simply a tube made of craft foam. I stapled my first ones together - formed a tube that fit the flash tightly out of black or gray foam and stapled it along the overlapping seam. This type of snoot will simply slide over the flash head and sit tightly with no further adjustment.
I have grown more sophisticated since then. My latest snoots are the folding type, which are just flat pieces of foam with velcro strips along two edges. You fold them around the flash head and can shape them by making it more or less conical. A snoot like that is a bit more cumbersome to mount, but packs absolutely flat and is very practical and flexible.
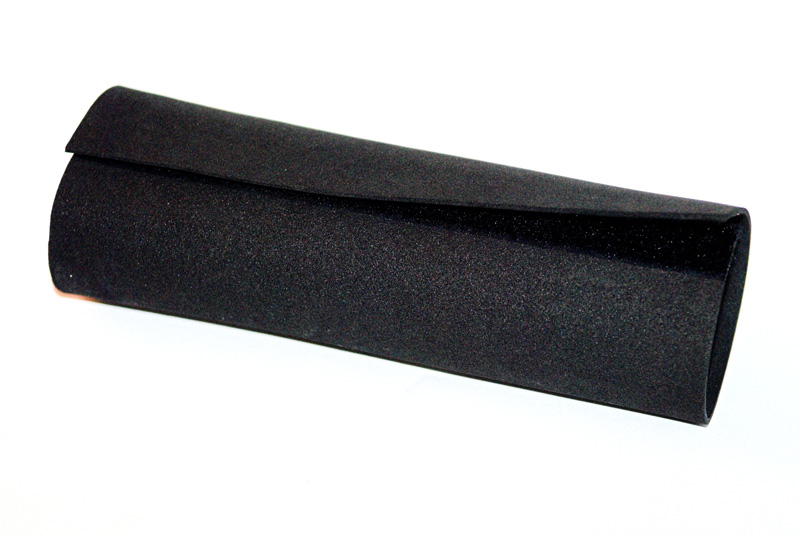
The foam can be almost any neutral color: black, gray or white - as long as it's not too translucent. The white foam tends to reflect the light a bit more and spread it more than the black and the gray. Some snoots have reflective insides, which on one side will prevent too much loss of light, but on the other side it will reflect and spread it.
You can make a set of snoots using craft foam and adhesive velcro. Simply measure the foam around the head of your flash, add a couple of centimeters or an inch or so and stick strips of velcro along the edges on opposite sides of the foam. Now you can simply fold the foam around the head of the flash and connect the velcro in order to get it to fit and have the shape you want.
You can line your own snoots with silver or golden reflective material from one of the world's cheapest reflector sources: emergency blankets from outdoors shops. They are extremely thin plastic sheets covered with aluminum, and can be bought for as little as one dollar. They usually provide both a gold and a silver side, and can be cut and used for all kinds of photo applications, including lining snoots.
Some of my snoots have grids - mostly made from black drinking straws, which I cut to length and simply hold together with a rubber band. The grid helps concentrate the light even more, but the snoot alone can do a fine job of keeping stray light off places where you don't want it.
Grids: snoots with a filling
Some snoots have grids inside them, but oftentimes the grids are just a loose set of closely assembled tubes. Most store bought grids are basically honeycomb structures, but they can also be made of single tubes, which are bundled to form a "pseudo honeycomb". Black straws for DIY-grids can be obtained from many party supply stores--or with a little luck from your local bar or diner, free of charge.
Depending on the length you want, you can come a long way with a few straws, while a longer grid like 5-10 centimeters or 2-4" will require a whole package. Simply cut the straws into a suitable length and glue them together inside a foam tube or similar structure, which will fit over the flash.
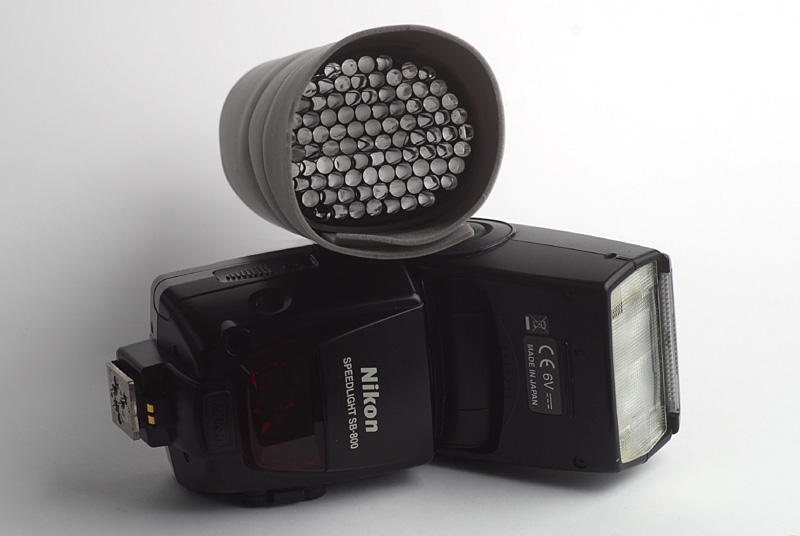
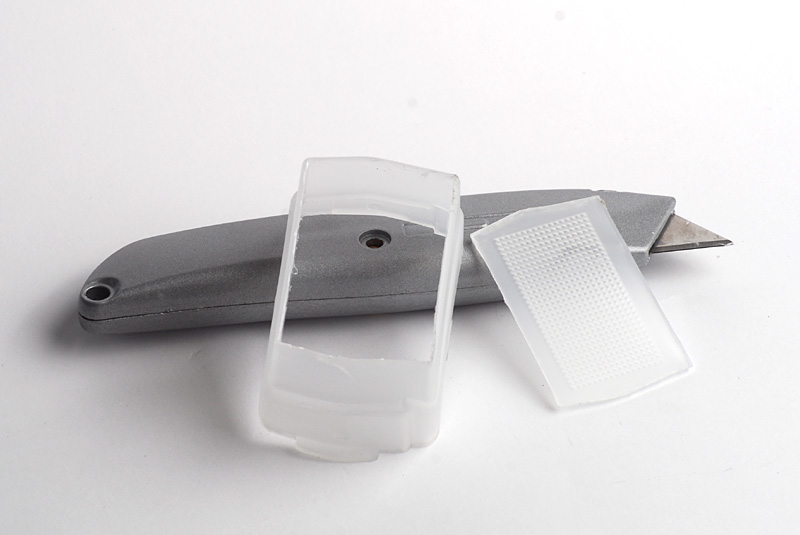
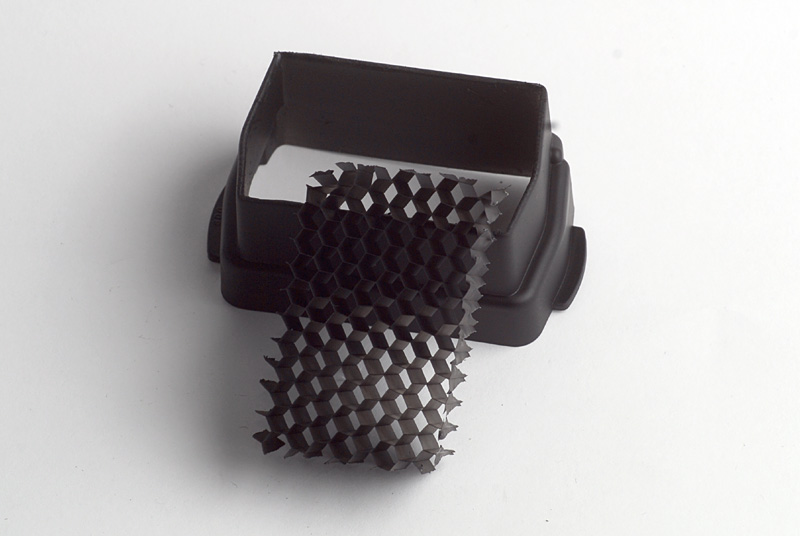
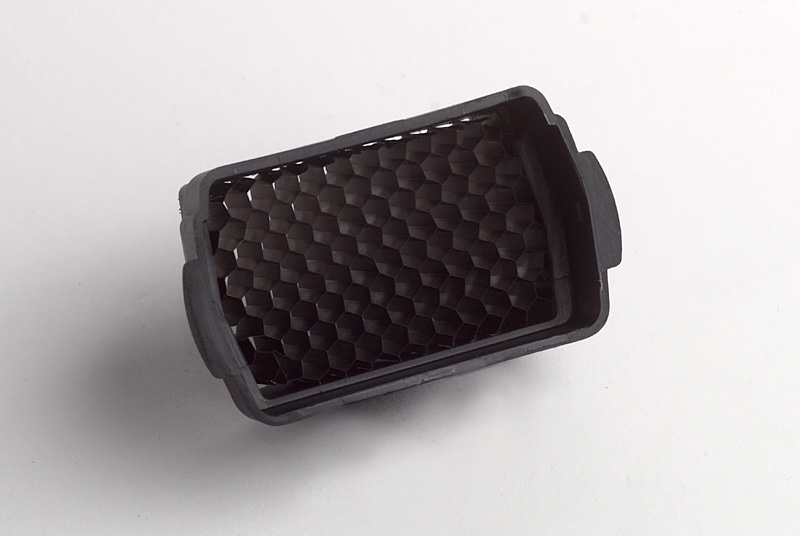
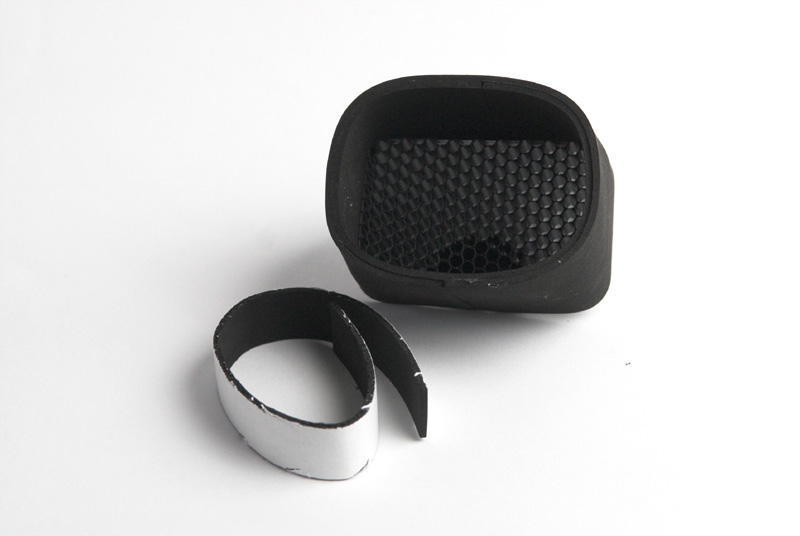
A sturdy and professional looking grid can be made from real honeycomb grids in combination with a slightly modified flash diffuser. I have made a couple of these short and robust grids by cutting the front out of a cheap opaque diffuser, painting it black and mounting a piece of honeycomb tightly inside. These short grids will control light nicely, but not give the tight and focused spot that can be obtained with the long snoots.

Grids can be obtained from Saxxon PC, where they are sold in many configurations, and the cheap diffusers can be bought by Precision Photo who also has a wealth of reflectors and other handy lighting accessories.
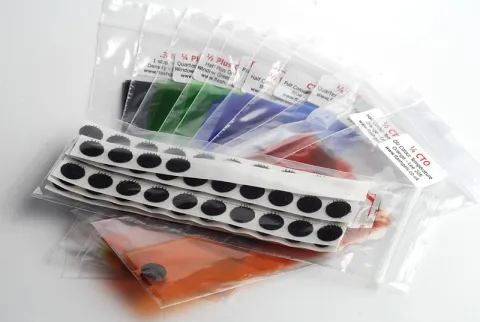
Grids for DIY-projects can be bought from different sources. I have ordered mine at Saxon Computers, where you can buy a nice selection of different plastic and aluminum grids, perfect for use with small strobes. The grids come in different depths and both in a fine and a coarser honeycomb pattern. You can cut the grids with a sharp knife - I used a long kitchen knife. The fit doesn't have to be perfect, but too large is of course better than too small. I simply pressed the grid into the modified diffuser and secured it with a dab of glue.
Saxon sells finished grids in foam tubes if you don't want to go the DIY-way.
Using snoots and grids
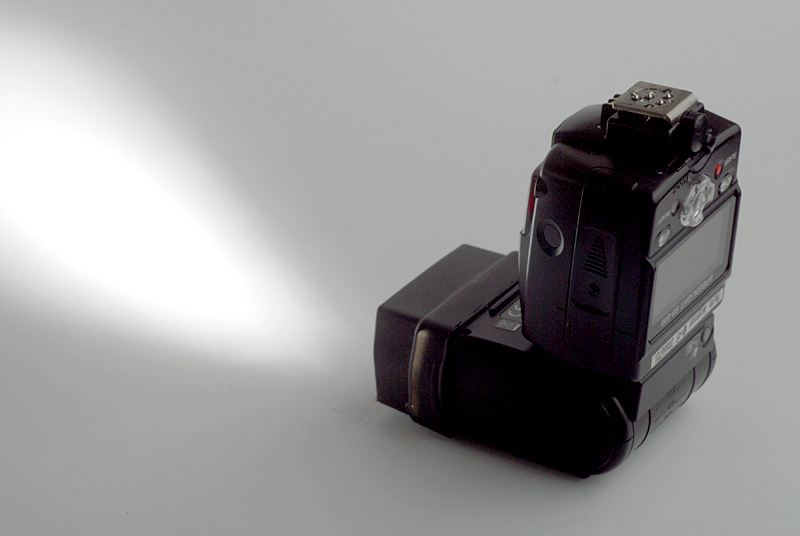
The way I most often use snoots and grids is to create a controlled rim light from behind on a portrait. The snoot enables me to get a really concentrated light, which is exactly where I want it - generally on the hair or the side of the face, but oftentimes also on the shoulder or side of the body. A bare flash will cast light everywhere and create a shadow falling towards the camera.
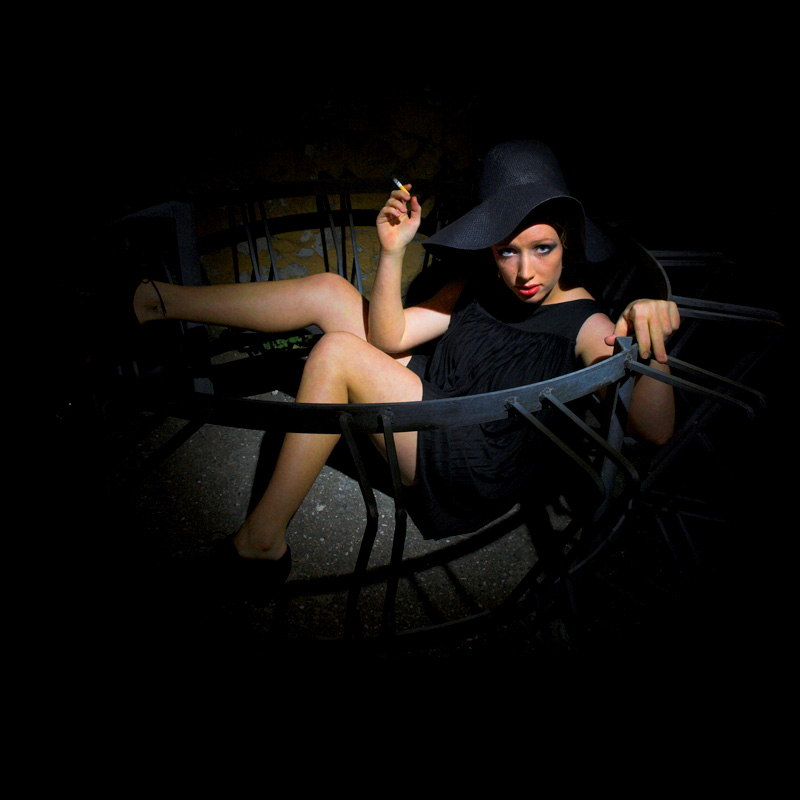
Another way of using the snoot or a grid is to get a spotlight effect and light up a certain part of the scene - a face, a detail or whatever, but also a whole person or a group of persons posed against a dark background. The snoot will enable you to blend the scene perfectly into black, an effect often desired in layouts.
Snoots are also very useful when lighting up a background behind your subject. Here you can make a well controlled spot of light, which can isolate the foreground. It's a very useful technique often seen used in portraits or product shots, where the soft spot on any background helps emphasize the main subject. By adding a gel or a gobo to the flash in addition to the snoot, you can even give this spotlight both color and structure.
Length does matter
The effect of snoots and grids depend mainly on the length of the tube(s), but the shape of a single tube can of course change the way the light is controlled. As a rule of thumb a shorter snoot will give a wider spot of light, and a grid of the same length will give a narrower spot than a bare tube. If you add a grid to a snoot it also narrows the beam of light and the longer the grid, the less spill.
Ready made grids are often labeled with an angle, like 20 degrees, 45 degrees or similar, and this angle refers to the angle of the beam leaving a flash mounted with that grid. The larger the angle, the wider the beam. The angles aren't precise, because they will depend on the length and size of the tubes in the grid combined with the distance between the grid and the flash tube as well as other factors such as the zoom angle of the flash. But generally a 45 degree grid is quite wide, while 10 or 20 is narrow. My longest grids are probably closer to 5 degrees and will give a narrow foot-wide spot even at long distances.
On some of the snoots that fold, which you assemble around the flash head, you can shape the tube more or less conical. The smaller the front opening, the narrower the light beam will be.
Factory made
I already mentioned the foam snoots from Saxxon, but there are many more ready made snoots and grids out there. David Honl has both a Speed Grid and a Speed Snoot, which attach to the Speed Strap also available from Honl. LumiQuest also has a neat snoot, which folds flat and seems to be able to fit most strobes.
A favorite snoot of mine is Saxon Computers' ready made mini-snoots with built-in grid, which are supposed to sit on your camera's pop-up flash, and at a price of 0.99 US$ for two must be a contender in the all-times-least-expensive-camera-gear-competition.
A mini-snoot
I will start this series about flash modifiers with the cheapest modifier I can imagine. They do come simpler as we will see later, but at two for 0.99 US$ it's gonna be hard to find a less expensive store-bought modifier. At Saxon Computers you get two mini snoots for less than one buck. You will have to pay for postage of course, but even so... they're really inexpensive.
Apart from being cheap the mini-snoot also separates itself from many of the other modifiers I will discuss by fitting on a built-in pop-up flash. OK, fitting may be exaggerating a bit. Let's make that: meant to be used on. The fitting mainly consists of a bit of gaffer tape. But once you have mounted the snoot in front of your built in flash, you can take some really cool shots. The mini-snoot is kind of a one trick pony, because what it does, does well and does every time you use it, is to narrow the direct, built-in flash down to a small-diameter ray of light.
It's much like the light from a flashlight or a stage spotlight. The effect is surprising and actually quite useful. It completely isolates any subject in the middle of the image and can render most of the rest of the image dark depending on your exposure settings.


You have to be a little careful about the direction it's aiming. I went extravagant and used two pieces of gaffer - significantly increasing the price of the setup, I admit, but on the other hand that ensured me that the snoot didn't shift once I had it centered. The intro image to this series of the fish figure on the wall as well as the image below were both shot using this snoot, and the one below was shot using a 10mm wideangle. As you can see, my good friend Henning really is like a hare caught in the lights from a car. The image is uncropped and shows how much the light is concentrated.
The Saxon mini-snoots consist of foam and a small grid, and you could probably easily make them yourself from craft foam from Michael's and some black straws - but I challenge you to keep material expenses below a dollar before the first two are made.