I supported a successful Kickstarter campaign which aimed to make a small and inexpensive Camera Obscura. I received and built my camera – and I already love it.
Camera obscura
The words actually means darkened room (obscured chamber, see?) and the origin has most likely been exactly that: a darkened room where an image was projected through a pinhole onto a wall or canvas.
The more modern meaning of the word is a smaller box acting as the room and a lens acting as a sophisticated pinhole and a piece of ground glass or paper acting as the wall or canvas.
The principle of the camera obscura has been known since before Christ and in ancient Greece it was described by Aristotle. The addition of a lens came with the appearance of ground glass in the 15th, 16th and 17th century, where different camera obscura constructions were used as a help in painting.
When the first “film” cameras were made, they were essentially camera obscuras with chemical substances smeared on the rear glass plate.
Les Cookson has been making beautiful, modern camera obscuras for some time, and wanted to make such a camera wider available. So he started a Kickstarter campaign.


Links
The Kickstarter page for the camera obscura
A place to buy the camera obscura
A Flickr group with camera obscura images
40,000 dollars
The original goal was to raise 3,000 dollars, but when the campaign ended in the beginning of March they had more than 40,000 dollars to work with, pledged by 345 backers. I was one of those backers, and had signed up for a deluxe model with a handful of extras like a camera rail, extra focus screen, closeup lenses and a cloth to shade the screen. That ran me about 120 US$ plus some postage, which was a very fair price. I also had to pay taxes and a customs fee to get it into the country, and including some paint and oil plus what else I might add, the camera probably winds up costing me about 200 dollars.
Production took place during spring and early summer, and I followed the progress through the comments on Kickstarter and I finally got my unassembled camera not long ago. Five pieces of maple wood, lenses and a brass tube to mount them in, different screens, some metal hardware and a few other odds and ends.
Assembly
Assembling the camera wasn't rocket science. The parts are beautifully finished and ready to put together, and after watching a video where Cookson shows how, I got out my mallet and put the wooden box together.

I mounted the raw box on the camera rail, put the rail on a tripod and experimented a little with mounting an SLR behind it. I found that my Sigma 30mm was perfect for the distance, but had to mount an old macro sliding rail to get the camera high enough and far enough away to get the whole screen in the frame.
I shot my first pictures with the unfinished camera right after having put it together, but since I had very little light, they came out a little dark, blurry and odd – but in a very nice way.
The finished camera obscura
After some sanding with increasingly fine grit sandpaper – using both machines and a final hand sanding with very fine sandpaper – I painted the inside of the box black using water based acrylic paint and oiled the outside using a neutral oil.
The camera is really beautiful. A very simple construction, which shows the natural wood and the dovetail connections very nicely. mounting the brass lens just adds style, and the only thing slightly out of place is the digital SLR mounted behind the whole assembly.

Using the camera
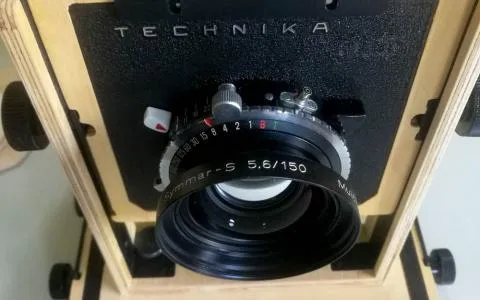
In use the camera is as simple as can be. Mount the lens – glass in for distance, glass out for closer focusing – slide in a focusing screen and maybe the Fresnel lens.
Focusing can be tricky since it's done by wiggling, turning and sliding the lens back and forth in the hole in the front plate. Friction is the only thing that holds it, but also the only thing that allows it to move, so focusing is not a delicate operation, and since it requires you to look closely at the screen at the same time, it can be challenging.
The lens is literally a lens – as in one lens element – and sharpness edge to edge or depth of field isn't its forces, so don't expect a super sharp image in the normal sense of the word. The lens also has significant light falloff in the edges, which the Fresnel lens to a degree helps eliminate.
Taking pictures
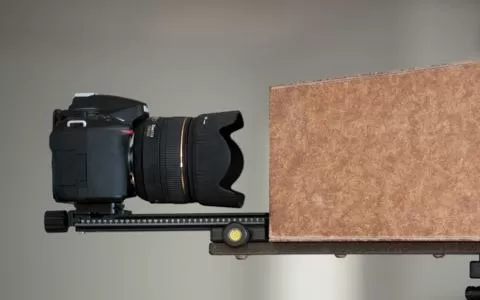
One thing is getting the image on the screen OK, but the next thing is to capture it. My aim has been to use a normal camera to capture the image digitally, and for that I have the camera rail that comes with the deluxe model of the camera obscura.
The wooden box is mounted in one end of the rail and the camera in the other. Aiming the camera at the screen and getting it in focus requires a little finesse. A suitable focal length seems to be about 30-40mm on a DX camera or maybe 45-55mm on full frame, but it has to be a lens that can focus close enough.
I had to mount an extra rail to raise the camera a bit and to get it a bit further away from the screen when using my Sigma 30mm f/1.4. I had an old Minolta macro sliding rail laying around, which fit perfectly.
Focus and exposure


Once the image is in focus on the screen, you need to focus the camera on that screen. That also requires some fiddling, and my preferred way is to focus manually and then use the sliding rail to make fine adjustments.
I have mainly used automatic exposure using aperture priority, but for some shots I have had to go manual to get the proper exposure.
It's important to use the included cloth over the setup because stray light on the screen or frame as well as light leaks can seriously affect the result. The cloth can be hard to control and get tight enough, so I will probably make some kind of firm but collapsible shade from thin plywood or stiff cardboard that blocks light effectively on all sides of the rail.
The results
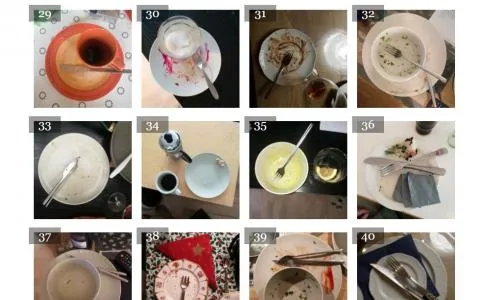
I have shot a few shots with the camera and experimented with focus and exposure, and find the results fascinating and mesmerizing.
The grain on the matte screen gives the images a very raw look and the light falloff and unsharp edges - even with the Fresnel lens mounted - is noticeable in all images and gives them a gritty look, which naturally enough has a certain resemblance with early glass plate photos.
When composing and shooting, the image is upside down, which gives a special feeling - and is slightly confusing - but at the same time encourages you to look at lines and patterns in the picture rather than the subjects themselves.
It's a great way of shooting and I'm already enjoying it immensely.


Update
Having shot outdoors and on the road with the setup has taught me a couple things:
- As already noted I will definitely need something better than the cloth to shade the glass. When draping the cloth over the cameras it's almost impossible to keep out all light, which is essential for a good exposure, and whenever I adjust it to block light, I get a part of the image blocked by cloth and will have to rearrange it again. Shooting with the least bit of wind makes this even harder. I need a firm hood of some kind, which sits snugly over and under the cameras and block out all light.
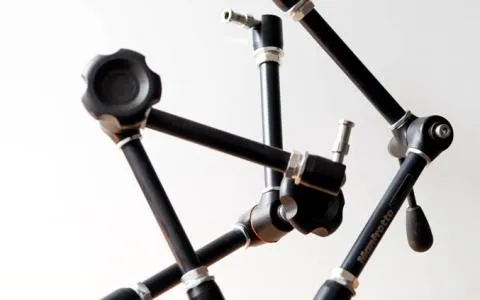
- When having both cameras on a rail and the whole thing on a tripod, there is very little control. Everything turns and has to be adjusted every time it's set up. I'm used to having everything very firmly connected with Arca-Swiss quick releases, and the flimsy thumb screw connections simply won't work for me. I will see if I can get all connections converted to Arca-Swiss for improved stability. I have ordered a handful of clamps and rails and will experiment with a more durable setup once they arrive.
Update to the update: I made the shadow box and improved the rail system.