I have equipped my camera obscura with some better hardware to get better control and in the end better images with it.


I have now used my camera obscura for a while and had a lot of fun with it. But mainly shooting outdoors and transporting the camera setup also taught me that I needed to upgrade the system that holds the camera obscura and the SLR together.
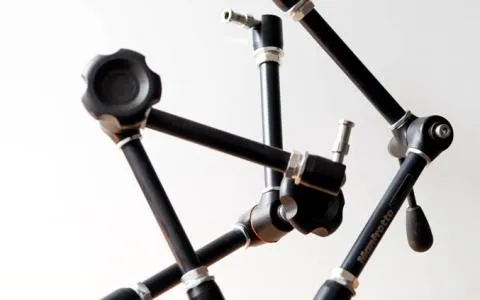
I have now made a much sturdier setup for mounting an SLR on the rail. I have done everything using Arca-Swiss clamps and plates and quarter inch bolts and nuts. I ordered a whole selection of clamps, rails, plates and screws and have now made a semi-permanent setup, which still breaks down reasonably well for transport.
On top of that I also made a wooden box to shade the glas plate and support the cloth that tended to blow around and let in stray light.
My new system
- I have mounted the wooden rail under the camera with a hex bolt. It has to be quite tight to hold.
- In the opposite end I have mounted an Arca-Swiss clamp.
- In that clamp I mount an 180 millimeter or 7 inch rail, which has its own Arca-Swiss clamp built in.
- I mount the SLR in that clamp and can now adjust it back and forth relative to the camera obscura.
Everything is very steady and nothing twists or turns unless under severe strain. And even then it hardly moves.
I use my Nikon D5100 as the camera. It has a perfect size for the alignment and equipped with my Sigma 30mm f/1.4 I get the right crop and a sufficiently close focusing distance. The D5100 even has a pivoting LCD and great live view, which can be handy when focusing is hard.


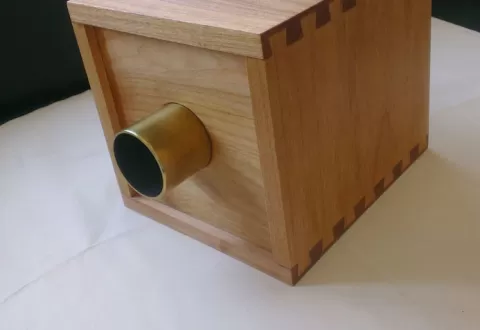
Shadow box
I also built a box to help keep out light when shooting with the camera obscura. It's a pretty simple construction made from thin masonite fiber board. I had thought about using plywood to get a better look with the wooden grain, but couldn't find any thin enough in my local builder's market. The masonite was a couple of dollars for a piece more than big enough for my use, so that's what I got. It's easy to work with and looks pretty nice after it has been oiled.
I measured the camera obscura and the rail while assembled with the SLR, and drew up a quick sketch to get the right size and shapes for my box parts. I only made one mistake in my design, namely putting the two asymmetrical sides next to each other to save a cut. No go! The board has a dull and a smooth side, and I needed the smooth side out on all pieces, and then the asymmetrical sides can't be identical, but have to be mirrored. My bad. I had enough board to cut a third side.


I got the pieces cut, sanded and oiled them and glued them together using some square dowel wood. Before assembly I drilled holes in the bottom for the screws and after the box was done I painted it dull black on the inside.
Now I can mount it on the rail between the SLR and camera and easily cover the few remaining openings with the cloth. The box keeps everything covered and keeps the cloth out of harms way even in the hardest wind. It also provides shadow that makes focusing the camera obscura much easier. All I need now is to make the hole in the camera itself slightly bigger to get the lenses to move more easily to aide focusing.
Lens selection
Finally I ordered a couple of extra brass tubes from Les Cookson, the man who has produced the camera, so now I essentially have three lenses for the camera, the normal lens and two closeup lenses. Changing the glass lens in brass tube isn't a huge job, but now I have all three assembled and ready to use.
Focusing isn't easy and telling the three lenses apart is also hard, so I have thought about making some kind of markings on the lenses indicating their "focal length" and some kind of distance scale. The thing is that labeling, painting or using a marker is not good because it will quickly be worn off when the lens moves in the hole in the camera. The best way will be engraving lines and numbers in the brass tube. But I don't have tools for that. I'll think of something.


Screws and mounting
Since the standard for cameras is 1/4 and 3/8th inch threads and I live in a metric country I have had some trouble getting my hand on bolts, nuts and grub screws to use for assembling the whole thing. I had a US friend mail me a bunch of screws and bolts (thanks Bob!) and also ordered a large handful of different button head and countersunk hex bolts as well as some grub screws from the UK and now have a good selection of different screws for assembling tripods, arms, clamps and plates.