I ask this question, not because I shoot manual all the time, but because some photographers seem to consider it better than any auto setting – which it's not
I do shoot in manual (M) mode now and then, setting both the shutter speed and the aperture manually and getting 100% control over the exposure.
This is necessary when I want uniform exposure, like shooting several images of the same subject, which are going to be shown together or even stitched together.
It's also handy when shooting several images in a static setup with a flash. I will typically set everything manually: exposure, ISO, flash power, white balance and focus. This enables me to get consistency over a range of images, and saves me a lot of post processing because the exposure will be the same from frame to frame. The thing is that modern cameras will do their best to optimize the exposure, and even the slightest change in a scene makes the camera recalculate the exposure, creating variation from frame to frame, even when shooting subjects that seem identical to the eye.
But 90%, if not 95%, of the time I use the really excellent exposure control built into my cameras. Modern cameras are little wonders when it comes to measuring exposure, and have all kinds of aides built-in that will help nailing it, even when the scene has complex light.
An example where manual would have worked
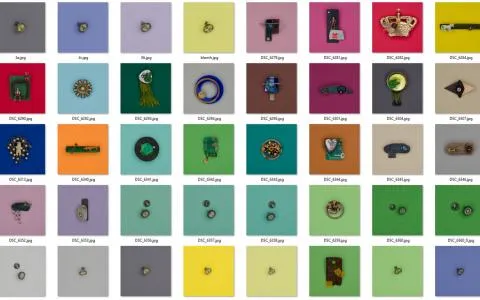
This example shows why I use fully manual when shooting a series of images - in this case a step-by-step instruction on how to tie a fishing fly. These particular images were NOT shot manual, and because of that you can see that the camera adjusts exposure according to the scene.


The main problem is of course the contrast here: completely white materials in the foreground and a totally dark background. The camera strives to do its best for the image, but tends to overexpose the white parts because the dark parts dominate.
As soon as something breaks the dark background - my fingers or the braided tubing - the camera exposes according to the new scene, and lowers the brightness significantly, resulting in a darker image, but also one that isn’t blown out in the brightest parts. Unfortunately this isn’t consistent, because even though my fingers are in the image, the system can still overexpose - in one case both my fingers and the white hair.
When I have shot the whole series on automatic, often consisting of 30-40 images, I wind up with a majority of images that are fine, some with minor variations, but also a handful that are way too bright or too dark. Adjusting these to consistency is a lot of work.
Had I shot fully manual, all images would come out with identical exposure, and I would save a lot of work.
All I’d have to do is shoot some tests before starting, making sure that my selected settings were OK. I mostly shoot for the brightest parts, making sure that I don’t loose details in the highlights. Darker parts often contain hidden details that can be salvaged if needed.
I shoot full manual because I'm a masochist
Now and then (quite often, actually) I see questions asked online about what exposure setting to use, and there's a surprisingly large contingent of photographers who will chime in with arguments such as “I shoot manual 99% of the time. I manually control ISO. I like the control.” or “I very rarely switch out of manual. Normally I set the ISO manually as well. I just prefer having full control.” and my favorite “I shoot full manual because I am a masochist.”
It's like shooting manual is the only way to get control.
Have all these photographers not heard of overriding settings, exposure compensation or adapting the camera settings to their liking?
Shooting manual is great when it's needed, but never using the automatic exposure control is like not wanting to use a calculator or a computer to do math. You are simply working harder for the same result – and adding a really big risk of making mistakes.
It's an intellectual challenge, sure, but unless your purpose it to be forced to think exposure for every shot, I think it's downright stupid not to rely on the camera.
A high degree of intelligence
You don't have to go manual to get control. Control is easy to obtain, even when running the camera in an automatic mode. The aperture and shutter priority modes (A and S), gives you full control over exactly aperture or shutter, but lets the camera figure out the other parameter.
On many modern cameras, you can actually lock both and use auto ISO, letting the camera adjust the ISO for perfect exposure, but locking down shutter and aperture. So this essentially does what you'd do when running manual: finding the combination of settings that match a given scene, but still letting the camera control exposure.
Sure the system can be wrong. Difficult situations like shooting into the light, subjects in bright light with shadow around them or subjects in shadow with bright light behind them. These situations and others can sometimes fool the exposure control on the camera.
I write sometimes, because modern cameras have a high degree of intelligence, and can actually “recognize” many difficult lighting situations and take them into account when setting the exposure. Snow, spotlights, backlit scenes, scattered light, high contrast, color casts and much more. All these scenarios go into the algorithm that calculates the exposure, and oftentimes the camera does a very decent job of assessing it.


Manual override
And if you know your way around f-stops and shutter speeds, you can override the camera's settings by using the exposure compensation dial, which can be operated with the camera held to the eye on most modern SLR's.
I often use “manual override” in a slightly different manner. I have shot truly manual for many years, back when I started taking pictures, and generally know what I want and how to get it using aperture and shutter.
I have my cameras set to aperture priority most of the time, I keep the ISO fixed and let the camera decide the shutter speed. On the newer cameras I have drifted more and more into auto-ISO too, because these cameras have very good high-ISO quality.
But sometimes I still get into a situation where I need to adjust the exposure compared to what the camera thinks is right, but I know is not.
Then I simply point the camera to a lighter or darker part of the scene to get it to adjust the exposure accordingly, and then press the AE Lock button on the back, recompose and press the shutter button. That enables me to quickly adjust exposure without changing any settings.
As soon as the image has been taken and I let go of the buttons, it's back in normal mode, unlike when using the exposure compensation dial, which has to be reset manually.
So, in other words: I force the camera temporarily to the settings that I want, but without actually changing any basic settings. This requires that I use a center weighted exposure control, which I do most of the time anyway. But even with a wider setting, I can often “trick” the camera to change exposure in the direction I want.
Manual lenses
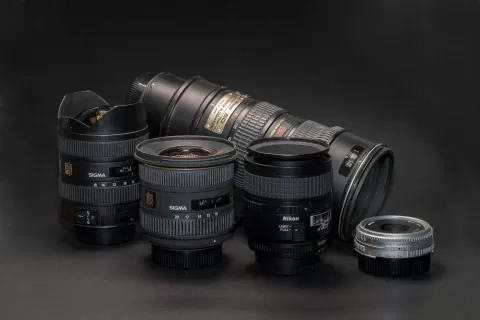
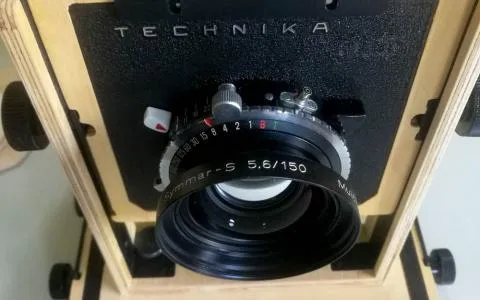
Some lenses do not allow for fully automatic exposure, mainly because they don't have the electronics needed to tell the camera the aperture. A lot of the less expensive but excellent and quite popular Rokinon/Samyang lenses have full manual control. In my own collection I have a couple of lenses that call for manual control like my Photex T&S and the odd but lovely Lomo Petzval and Daguerreotype Achromat lenses.
My pro Nikon bodies allow for some exposure control, but since some of these lenses require me to stop down manually before I expose (or use aperture plates in the Lomos), I mostly set the exposure to full manual.
A classic “Sunny 16” estimate and a test shot followed by a glance at the LCD will decide the basic settings, and from there I can vary the exposure slightly to get well lit frames.
What digital cameras can control
When, why and what you want to control manually.
Shutter speed
Shutter speed essentially controls motion – or freezing or not freezing motion. Short shutter speeds will give you sharp images of things that move, which is great for sports and action. Short shutter speeds also eliminates camera shake, which can be great for handheld shooting or longer lenses. Long shutter speeds gives motion blur, which can be useful where you want motion to show.
Also, shorter shutter speeds let in less light while longer lets in more, so short shutter speeds require light, which is bright lenses, smaller aperture numbers or higher ISO.
Aperture
Aperture controls depth of field (DOF) or what's in focus around the distance where the lens is focused. Small apertures (large numbers) gives greater DOF, large apertures (smaller numbers) gives shallow DOF. This is nice to control for portraits where you might want shallow DOF or landscapes and reporter style images where you want as much to be sharp as possible.
Small apertures (high f-numbers) also let in less light and larger ones let in more, so small apertures and larger sharpness range requires more light in the form of longer shutter speeds or higher ISO.
ISO
ISO is the sensitivity of the sensor, and lower ISOs will require more light while high ISOs will allow you to shoot with less, but also give you noisier and grainier images. Usually you want the ISO to be as low as possible to get the best possible image quality.
Low ISO values require more light, high ISO values require less, so raising your ISO will allow for shorter shutter speeds, freezing motion and camera shake, and smaller apertures (larger numbers) giving more depth of field with the same light.
White balance
The white balance is the camera's response to the color of the light that forms the image, and to some extend the color of the scene or subject. Most people shoot with auto white balance, but sometimes it's a good idea to set it to a fixed value in order to obtain controlled and consistent colors.
While shutter speed, aperture and ISO work together on deciding the exposure, white balance does not influence exposure as such, only the color cast in the image. If you shoot RAW you can change this later in the process, unlike other exposure settings, which decide the final properties of the image.

An example
To make my “manual override” method easier to understand, I have included an example. This was shot in a large barn on a sunny day.
The first image shows the scene. It’s well exposed because the light is fairly evenly distributed and the disturbing bright spot on the rear wall is essentially ignored by the camera.
On the following pictures, I have zoomed in on the two people in the foreground, and now the bright rear wall dominates, and the camera exposes for its brightness and as a result underexposes the two persons. I can raise brightness in post, but I may not have the details I want in the dark parts.

In the above, annotated, image you see my zoomed frame as colored rectangles, and I have tried to indicate the sequence of my operation:
- Red: I find focus. I almost always use a single central focus point and back button focus, so once I have set focus, it won’t change again.
- Green: Knowing that the camera will underexpose the persons, I find an area where the light is as it is on the persons, in this case the lower left part of the scene.
- Green: The camera adjusts the exposure to this area, overexposing compared the the back wall, but perfect for the people. I lock the exposure using the AE-button.
- Blue: I recompose the image and take my pictures, still holding the AE-lock, knowing that the camera will expose for the dark parts and render a lot more detail in the subjects’ faces while overexposung the back wall.
The final images have a much better exposure with regards to the people in the frame.
When I let go of the AE-lock, I’m immediately back in automatic mode.