I was commissioned to shoot a continuing series of images of jewelry for a web site. Here’s what I did.


A couple of years ago my wife started making jewelry of "found objects", meaning that she would take various – seemingly random – items and combine them into brooches, charms for necklaces, cufflinks, pins and other things.
She started doing it for fun with various bits and pieces she already had in her storage of "nice things to have for projects". She made them for fun and primarily for herself, but also gave away a few of her products as gifts. Not long after she had begun, people started asking her if she could make them to order or if she’d sell what she had already made.
Now, a couple of years later, it’s developed into a small side business for her. She produces a couple of new pieces a week, has a small workshop in our house and about a year ago she launched a web site where people can browse and order her stuff.


In the beginning she’d shoot images of her makings using her phone and posted the images on social media – just to show what she had made.
But with the advent of a web site, she needed something a little better quality and more consistent. Since I have all the gear, some experience and also the room to set up a small tabletop studio, I was commissioned with the task of shooting the first batch of about 20-25 pieces, and have continued adding images of the new products as they come.
For the first set I did some experimenting. I have some experience shooting macro photos of things such as coins, fishing flies and various other small items, and had shot them using light tents, setups with multiple flashes, reflectors and different backgrounds and surfaces.
So I tried different setups and light settings, and played with mirrors, tiles and foil as backgrounds and to lay the jewelry on to get snazzy light and reflections. I also experimented with natural materials such as branches, bark and stone, which can give some interesting images. While it did work for some pieces, it was a misery for others, and in order to get the jewelry decently lit, I’d have to vary both the light, the reflectors and the selected backgrounds. It simply didn’t work.


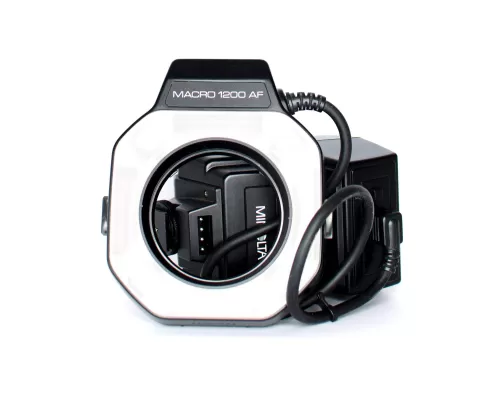
So I tried something quite different: a ringflash. Most photographers who shoot jewelry, watches and other small, shiny objects, would probably cringe at the thought of using the flat and shadowless light of a ringflash. Most of these photographers spend an ungodly amount of time on adjusting lights, reflectors and blockers to get the proper reflections and show structure and surfaces of the piece. The flat light of the ringlight would most likely make that an even harder job.
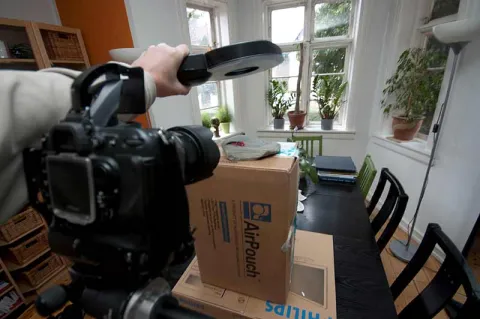
I opted for the directly opposite of the complex: simple and even light, straight from above on the piece laying flat on the background, shot with a macro through the ringlight.
My key to getting a varied and interesting series of images was two things: the jewelry itself with its many sizes, shapes and colors, and using brightly colored, uniform backgrounds – a different color for each piece. I had bought a couple of paper pads with various bright colors of medium cardboard. Perfect for backgrounds for small things.
Most of the jewelry my wife makes is fairly flat. A few of her things are more three dimensional, and needs some help to show their shape. A few pieces of bent wire, some adhesive rubber and a few other items have enabled me to tip and turn some of the non-flat pieces and show their shape. On a few I have shot some additional shots in different setups to show an angle, which would be impossible under the ringflash. The web site uses one single image to present every item on the front pages, but when you click to see details, there’s room for more images.
I also opted for square pictures, which work well on the site, and also gives a uniform impression when you browse the pages. The pictures show the items in "almost scale", meaning that most are shown to give an impression of their relative size. The description contains a field for measures, so showing the exact size isn’t very important.


Because the subjects come in in batches, I typically shoot between one and maybe five pieces at a time, and there might be a week or two between. This is made very easy by the simple setup.
I simply set my D5100 with a 40mm macro at the proper distance above the table, mount my Roundflash and an SB800 on the lens and camera. With a fixed flash setting and aperture I have the exposure under 100% control, and setting up to get images exposed exactly like the previous ones is done in minutes. When I don’t need the camera or lens for other shots, I simply leave it set up, and can just slip the subject and a background under the gear, turn on everything, use the live view on the D5100 to arrange the subject and press the shutter.
I only do few adjustments in Lightroom, typically lifting the shadows and maybe increasing saturation. Sometimes bright areas need a little dampening, but mostly I underexpose slightly to avoid blown out highlights. I crop the image square and export it, and it’s ready for the site.
BTW: The site is called Smykkeflikker (Jewelry Tinkerer) and is found here.