Build a small softbox
...very small, that is.
PDF-plans
You can find a set of drawings for the parts to the softbox in PDF-format here.There is one that prints on A4-format and one in Letter-format.
This little project was spurred the need for a small flash softener for macro photography, and an urge to fool around with some DIY-projects.
I could have bought a softbox on the market. There are plenty available: collapsible models, large and small, inflatable and many more. An there are bouncers and softeners galore. But I thought it would be fun to do it myself.
Cardboard-thingy
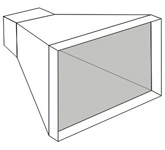
I envisioned a small cardboard-thingy, about 20x30 centimeters (4x6 inches) in the opening and not too clunky. I wound up with a 15x20 centimeter box. Enlarging this would be fairly easy.I drew up some sketches on the computer and printed them on normal printing paper to fold and test the measures. And my school time geometry seemed to have done it. The parts fit together and it looked like it could work. The drawings on the downloadable PDF's are for a Nikon SB-800. If you want to build a box for other flashes, you have to adapt the size of the smallest tongue of the shapes to fit your flash. Measure with a ruler and apply to the drawing, adjusting the lines that form the triangle.
So it was off the the craft store to buy cardboard and other materials. I selected a nice and smooth white cardboard as the base. It's about 1 millimeter thick, which is 0.03 inches or what some might refer to as somewhere midway between 1/32 and 1/16 of an inch. It's not really critical.
This is sturdy enough to make a durable box, and at the same time thin enough to be convenient to cut. I bought a big sheet, but since the shapes will fit on
I also found some thin silver cardboard to line it with. I could have opted for aluminum foil from a kitchen drawer, but this seemed a bit more "professional" to me. And as the last piece of material I needed some opaque plastic, and the craft shop had exactly what I needed in the form of covers for spiral bound papers. These were available in many different thicknesses and types, and I chose one that was white, matte on one side and thick enough to really be opaque and at the same time let light pass. And thick enough to hold itself, but still be easy to cut.
In my basement I found some small square wooden sticks and armed with a sharp and sturdy knife, a long ruler, a cutting board and tape and a glue gun, I was ready.
The cutting room
I printed my drawing on a couple of pieces of paper. If you have a printer that can take thick materials - many ink jet printers can - you can print directly on the cardboard, provided you bought it small enough to enter the printer. I used a small trick: with a ruler and a soft pencil, I drew on top of the printed lines. Then I turned the print over and taped it onto the cardboard. Then I simply rubbed the pencil drawing over on the cardboard by rubbing over the backside of the drawing with a nail. This transferred the pencil markings onto the cardboard, and I had precise lines to cut along. You will need to do the same on the silver cardboard, unless you use tin foil.Cutting board this thick requires a bit of finesse and patience. Just take your time and work through the board in several strokes with the knife. That will give you a nice, clean cut. I use a soft cutting mat to do it on. It keeps the board from slipping.
After having cut the four pieces, I cut shallow grooves along the folding lines to enable easy folding. Cut the front fold (long) on one side and the rear fold (small, towards the flash) on the other. This will make it easy to fold the zig-zag shape we want. Bend the cardboard to get the proper shape
The plastic front can be marked and cut in the same way. Cut another, smaller piece of the plastic to mount inside the box.

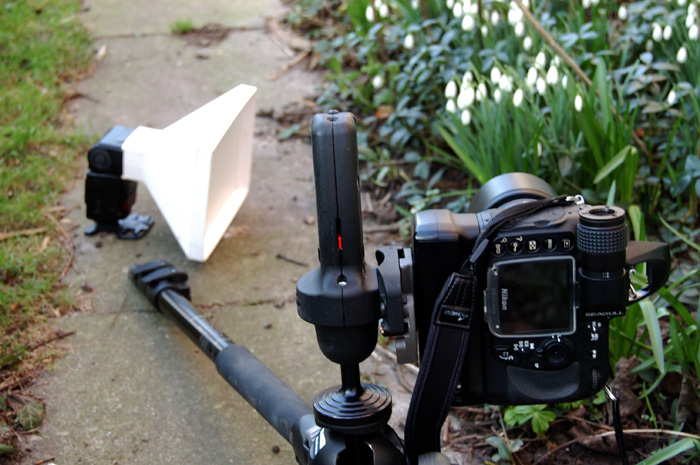
[Nikon D200, SB-800 triggered wirelessly]
Some assembly required
The easiest way to assemble this is to mount it on a flash. I took out an SB-800 and attached the thin end of the cardboard bits on the flash using a strong rubber band. This allowed me to fit the parts together properly and secure them with some bits of tape. When the box was sturdy enough to be removed, I glued with hot melt glue along the inside of the box.After this I taped all connections over on the outside. The narrow part, that fits over the flash, was secured by wrapping a generous amount of tape around the rectangular tube formed by the cardboard. I made sure it fit snugly over the flash, and was pleased to find that it fit so well that it could sit there with no further help. A loose fit could be helped by adding a velcro strap to go around the back of the flash head and attach on the opposite side of the box. Unfortunately that would hinder the tilting action of the flash, but it would ensure that the box stayed put.
Inside
I now proceeded to glue the silver parts to the inside of the box. Use a few dots of hot melt glue or a glue stick. The smaller piece of opaque plastic should fit somewhere inside the box. Its job is to initially spread the light.I used four small wooden sticks glued to the inside to support it, but you can essentially just drop it into the funnel-shape of the box until it rests on all edges, and secure it with a bit of melting glue. Don't worry much about appearance. There are no style characters given here.
I also folded up a piece of bubble-plastic of the kind used to pad fragile stuff in packages. A small piece folded up a few times fit nicely inside. The last step was to add the front opaque plastic. In my case it was just a bit on the large side, and I trimmed it carefully until it fit, dropped it in there and secured it.
Ready to shoot
That was it. I was ready to shoot. My small softbox is best suited for smaller objects. A rule of thumb is that whatever I try to illuminate with this softbox should be no larger than the softbox itself. It's perfect for macro shots, flowers, insects, items like small toys, coins etc. If you use it for portraits and similar size objects, it will of course soften the light, but there will still be shadows.It distributes the light nicely, and the Nikon system's built in exposure control works fine with the box mounted. I use the box wireless on my SB-800/D200 combo, and it's a much better idea than using it while the flash is on the camera - even though that will work too.


[Nikon D200, SB-800 triggered wirelessly]